

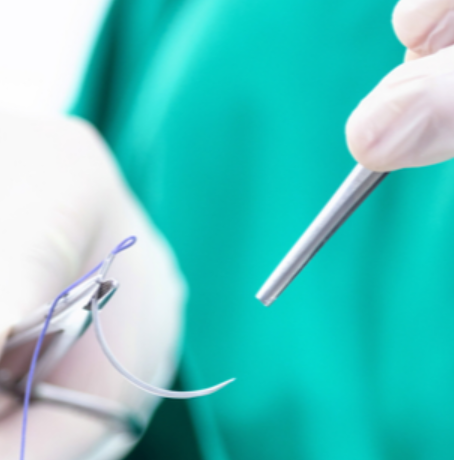
How can I prepare for my nurse practitioner job with family practice?
This is the million-dollar question, isn’t it: What do I not know that I need to know? Although we could easily discuss the many privileges routinely and customarily performed in different nurse practitioner roles, today I would like to focus on suturing, as this question comes up many times in our courses. Our conversation today will be focused in the Family Practice setting.
The Simple Interrupted
Good news! If you never learn any suturing technique beyond the simple interrupted, you will be able to close 90% of wounds. The independent strength profile of each knot compared to its neighbor is both a blessing and a curse. The blessing is that a failure of one stitch has zero bearing on the ability of the wound to remain intact (unlike a running stitch unraveling) since each pass gets a separate knot. Accordingly, the curse is the time required to place each knot and when compared to a running technique, this is considerably slower.
Although this can be used on just about any wound, and seemingly does get used on every wound,
IT DOES NOT MEAN IT SHOULD.
One huge learning curve of the simple interrupted is the need to puncture the tissue in a perpendicular fashion, or as close to 90 degrees. Failing to do so and rather taking an angled bite towards the wound on both edges will cause tissue inversion, which is the enemy of wound closure. Inversion promotes an increase in dead space between the tissue edges for seroma, hematoma, and scar formation to occur, and risk of poor tissue adherence.
Note: Although a wound with eversion, or a central upward peak, may look less cosmetic at the time of closure, the long-term benefit will be the dermis having great contact and minimized dead space, thereby reducing risk of seroma, hematoma, and scar formation. Don’t worry, the eversion bump will go away with time.
The Buried Figure of Eight
Small dermal lesions or elliptical excisions leave a bit of tension in the closure to manage, and a shrewd proceduralist would recognize the benefit of not tugging hard on the edge of the incision for the most cosmetic results. You want to have a bite extending into the tissue so more tension is managed farther away from the edge of the wound.
Note: Video demonstrates a X on top, knot on top style of figure eight technique.
The figure of eight provides good tension control and a fantastic mechanism of reducing scarring when done in an entirely buried format. The figure of eight, also known as the cruciate technique by some, can be performed in four different variations. It is composed of two adjacent simple interrupted stitches that commence with one knot. This causes the “X” appearance. One side of the wound will be an “X’ while the other will be two straight lines 100% of the time. In order to do this buried, it simply means to not penetrate through the epidermis and work from inside the wound entirely. To perform this, TWO DECISIONS must be made for the proper version (knot on top or bottom or X on top or bottom; 4 possible versions).
Decision #1 is where to enter the skin. If on top of the skin, the knot will be on top of the skin at the end when tying the knot. If started below the skin and the tail is left to tie to in the inside of the wound, the knot will be buried. It is one or the other and is the first decision you have to make.
Decision #2 follows decision #1. After you have performed your first pass into the tissue, you will pass either straight across or on an angle. The angled or “travel” will determine the side with the “X”, so your next move sets up the rest of this technique.
I recommend learning all four possible types, but for a buried “X” and buried knot, the “travel” or “X” appearance will be on the bottom of the wound and help tamponade bleeding and close dead space while the “balance “II” lines opposite the “X” will bring the wound lines together with symmetry and minimize scarring.
If this technique is done in a fully buried technique, there will be no suture to deal with later and the scarring and after-effects will be minimal.
Note: as with any fully buried knot, a suture selected would need to be absorbable such as Monocryl, Vicryl, Polysorb, or similar. Size selection is always based on smallest possible to satisfy the tension of the wound and provide a cosmetic appearance when desired.
Keith Needle Subcuticular
If you want to go for full-on cosmetic, this is for you. Closing a small excision for a subcuticular mass such as a lipoma or sebaceous cyst can seem challenging if you want to be “pretty” about it and avoid the telltale marks of the simple interrupted, consider this your go-to. I will say this warning. Although you can do a subcuticular stitch when there is mild tissue tension for re-approximation, I would highly recommend a few buried stitches spaced through your wound to help align and evert your tissue before relying on the subcuticular for tension. Despite popular belief,
This is NOT designed to be a tension management technique.
It is designed for approximation of already near-approximated tissue for best results, so don’t expect a great result when a 1cm wide elliptical excision is done and you pull this trick out. Save this for when your skin comes together without much effort and you simply want to make it look pretty.
Performing this technique requires a non-absorbable suture such as nylon monofilament for best results since the suture will be removed in this version of the technique and absorption is neither desired or helpful. Unlike a fully-buried subcuticular stitch with a curved needle, this technique is done using a Keith Straight (KS) needle, which looks like a sewing needle with a cutting point rather than a taper point.
Note of caution: These are extremely sharp, so watch out for your fingers or it will happily feed on your skin if not diligent in safety. The technique involves entering the wound from past the apex (end) of the incision on one end, (typically the proceduralist’s dominant hand side) and making a snakelike movement through the wound until the other end of the wound is reached and the needle is driven up from below the apex and through the epidermis. This leaves only two points at which the suture penetrates the tissue and the rest through the wound is all buried.
Keith subcuticular technique relies on you to see the patient in a reasonable timeline and remove the suture from the wound. Removal is where the Keith needle shines. Since it is straight instead of curved, it is extremely efficient (technically the most efficient of any needle) and allows for easy removal of the nylon strand by simply pulling from one end of the wound and presto, you have a well-approximated wound with zero suture left to become irritating or a potential source of inflammation or worse, infection.
Is the above content confusing? Of course it is. Words are not video, and video is not hands-on training. If you want to have confidence in suturing techniques, invest in a course that covers 8-16 hours of content to get your hands learning the principles and build proper muscle memory. We have some great courses available to suit learners at any stage at www.skillsonpoint.com If you would like to check out a great FREE resource now, our Suturing Techniques 101 course is available and covers each of these with videos to give you study material.
Thanks for reading, and come see us for a hands-on experience to set you up for success! Our next episode will cover some Immediate care and Emergency Department-specific techniques!