

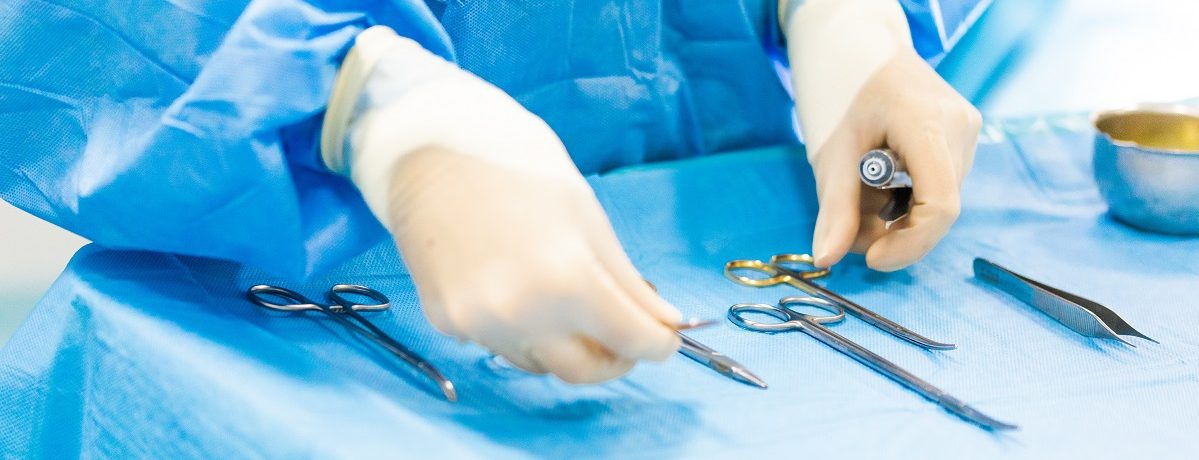
When it comes to lacerations and incisions, nurse practitioners and physician assistants frequently will tell you the enemy of good wound closure is tension. I don’t mean the wound has anxiety and unresolved daddy issues. I mean quite literally the wound is under too much oppositional force to allow the tissues to approximate for their full depth. Here are a few tips and tricks you can use to master your wounds coming together like a first assistant!
Tip #1: Each Wound Layer Gets Sutured, Zero Exceptions
One of the easiest ways to manage tension is to close the wound one layer at a time. As you go from deeper layer like fascia and subcutaneous fat up to the shallow layers like dermis and epidermis, you will see a massive wound come together in reverse of how it was created: one layer at a time. Deeper layers will require an absorbable suture to benefit from a multiple layer closure technique, and a common choice for just about any wound closed in an operating room.
After a larger surgery like a sternotomy, is very common to close the deep pre-sternal fascia and subcuticular layers with #2 absorbable polyglactin multifilament. Then we use a 2-0 absorbable polyglactin multifilament to close the deep dermis followed by a 4-0 polyglactin multifilament or monofilament to close the superficial dermis for the final closure. As each layer gets closed, the wound gets closer together and if you were to jump over a layer, you would leave dead space. Dead space is the friend of seromas, hematomas, or abscesses, not to mention scar and dehiscence. Take your time, do it right the first time or pay for it later.
Tip #2: The Lines of Langer Are Your Friends
What are the lines of Langer? They are the natural lines of the body superimposed on an anatomic model of the human body. They are useful to use as a reference as to which direction you should put lacerations on the body. The only problem with this is many times you don’t get to choose the direction the laceration on the body will be, but if you get to choose, use these as a great resource to help hide the incision in the tissue in such a way that it is neither as visible and likely a bit more elastic to approximate.
Tip #3: A Dirty Wound Will Not Close
It seems pretty obvious, but you can’t will a wound closed. You also cannot fight the human body’s desire to act like a self-cleaning oven. When the body decides it can’t win against a foreign invader, the next step is to purge it. The wound may partially close, but if you fail to identify a bacterially-burdened wound based on the mechanism of injury or the presentation, you will soon find out this phenomenon firsthand. Clean your wounds aggressively and thoroughly, and if you are not sure it will close, don’t choose a technique that attempts to provide margin approximation. Choose a technique that provides overlap and allows the wound to drain any bioburden.
Tip #4: Suture Size Matters
As I mentioned above in tip #1, each layer should get an individual suture selection, but in the same regard, but even if you only close one layer of tissue, each layer received a different size of suture, and there’s a good reason for this.
There is no magical suture size to use in different locations. Rather think of suture size like a pendulum with one size on “Strong but Ugly” and the other side on “Weak but Pretty”. Dermal skin closure deserves the pendulum to be straight downward on 3-0 or 4-0. If you want to swing the pendulum towards strength, you will suffer cosmetics, but your technique can be used for more aggressive holding power. These may be sutures like 2-0, #0, or #2, for example. If you want to swing the pendulum towards cosmetic closure where there is no tension or it has been managed well in deeper layers, you will suffer strength. A common mistake is to use too small of a suture to manage tension than is appropriate, and end up knifing through the tissue, leaving a pattern of scarring like a railroad.
Tip #5: Technique, Technique, Technique
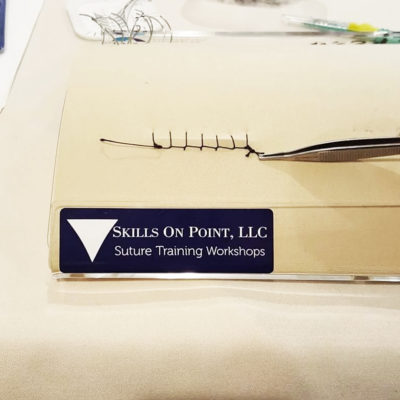
Without a doubt, one of the most important decisions in wound closure is picking the right technique for the application. There are hours dedicated to this concept at a high-quality suturing workshop like the Basic Suture Training Workshop or even moreso at the Comprehensive Suture Training Workshop held at Skills On Point.
Techniques such as simple interrupted may seem ok, but when tension gets added to the mix with edema, tissue loss, or multiple layers of depth to close, you will quickly find it underpowered for the application. Mattress stitches are fantastic for approximation, but their use comes at the price of cosmesis. Staples are also fantastic for strength, but are likely to leave scarring if done under too much tension.
Your best bet is to think of skin like the delicate and beautiful organ system it is, and if you manage the tissue the way it best moves, the strength each layer is designed for, and how the body would naturally fix the problem, you just might see your wounds look a lot more like the pro’s who close wounds every day. If you haven’t ever checked out our courses, you owe it to yourself and your patents to spend some time learning how to do it the right way. We will show you each step, and have a ton of fun in the process. Who knows, you just might be the person who stitches me up someday!